How To Patch A Garden Hose
Table of Contents []
How To Patch A Garden Hose
Introduction
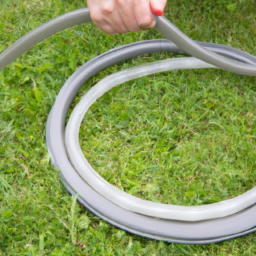
Gardening enthusiasts know the importance of carefully tending to their beloved lawn and garden spaces. One of the most wandered objects in the garden is the garden hose. Hoses are subject to all manner of wear and tear over time, from entangling itself among other garden objects, being stepped on, punctured by garden tools, and being affected by temperature fluctuations. Thankfully, patching a garden hose isn't rocket science; by following a few simple steps, gardeners can extend the life of their garden hose and keep their garden looking beautiful and healthy.
This article will provide a comprehensive look at how to patch a garden hose, from understanding the tools necessary, general repair advice, and the various patching techniques available.
Types of Patches
The first step in patching a garden hose is understanding the types of patches available. Many gardeners choose to patch their garden hoses with either rubber or plastic patches. The most important thing to keep in mind when selecting a patch is that the patch should match the material that your garden hose is made from. Rubber patches are often thought of as more reliable, however plastic patches are often easier to use for small repairs, and tend to be less expensive. Regardless, make sure the patch you choose is compatible with your hose material.
General Repair Advice
In addition to selecting the right type of patch, there are a few general pieces of repair advice when patching a garden hose.
First, and perhaps most importantly, is to make sure the area to be patched is clean and dry. Dirt, dust, and other debris can cause the adhesive to not take correctly, leading to a patch that won't stay in place. Make sure to use a paper towel or cloth to thoroughly clean the area before attempting patch the hose.
Another key piece of advice is to make sure that the patch you're using is the correct size. Make sure there is about an inch of overlap to ensure the patch will stick correctly. If the patch is too small it won't fully cover the area and won't stay in place.
Patch Application
Once an appropriate patch has been selected and the appropriate area to be patched has been cleaned and prepared, it's time to apply the patch.
Before applying the patch, it might be worthwhile to apply a thin layer of glue to the area to be patched. For plastic patches, a rubber-based adhesive works best, while a rubber-specific glue should be used for rubber patches. Glue helps to both strengthen the patch and make sure it's well-adhered.
Once the glue has had some time to set (follow the manufacturer's instructions as far as how long the glue needs to dry), it's time to apply the patch. Since patches are usually thin and easy to damage, handle it carefully to avoid damaging it. Before applying the patch, make sure to align it with the length of the hose, to ensure that the finished patch is even and in line with the rest of the hose.
Once all of these preliminary steps are done, all that's left is to apply the patch. Using a roller or a cloth, press the patch firmly to the hose and press out any air bubbles. Make sure to press down along the entirety of the patch, and then let the patch dry for as long as the manufacturer recommends.
Conclusion
As long as the right type of patch is used and the area is properly prepared, patching a garden hose is simple. Understanding how to patch a hose properly is an important skill for any gardener, and can save time and money in the long run. With the information presented here, gardeners can confidently patch any garden hose and keep their garden looking beautiful and vibrant.

Previous Page
Next Page
